

Spectrum Scale on Ubuntu
What is Spectrum Scale
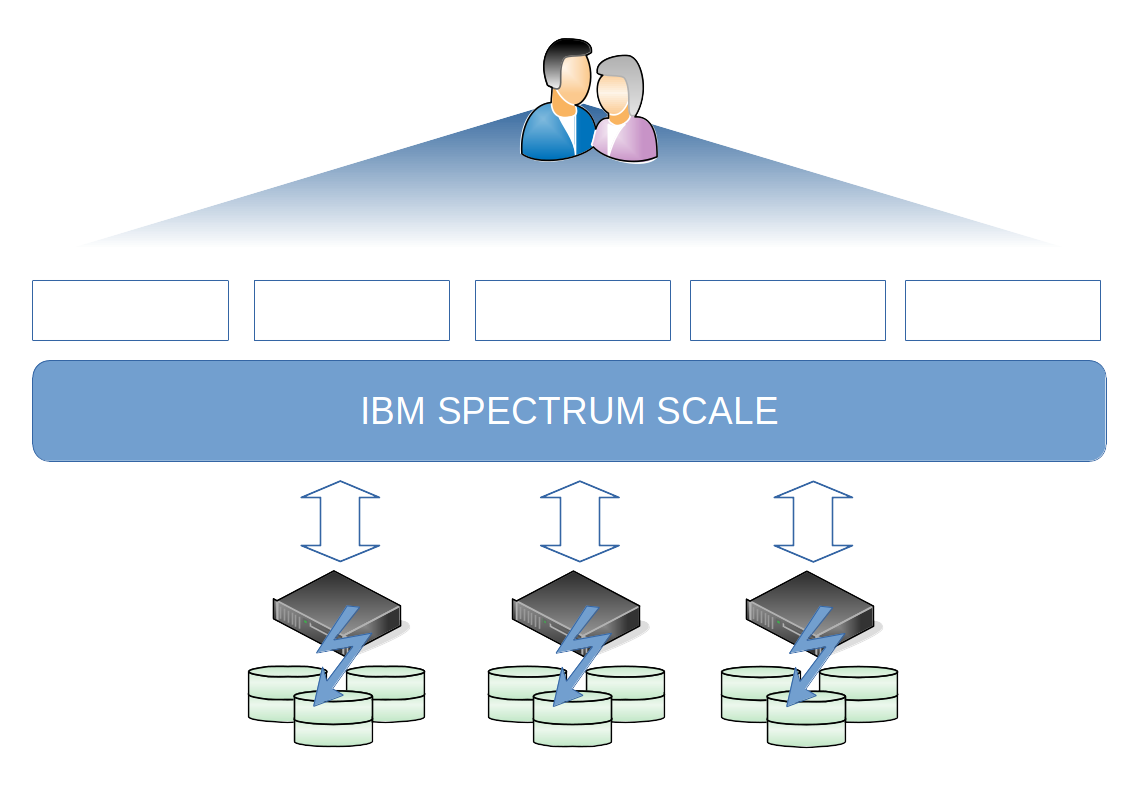
Spectrum Scale is a Scale-out High-Performance cluster that can in theory can create filesystem as large as 8 Yottabyte. Spectrum Scale also called GPFS (General Parallel File System) was introduced 1998 for AIX, but this days you can install Spectrum Scale on x86 Linux, zLinux, Linux on Power and Windows Servers.
Spectrum Scale is a very popular filesystem at Universities where you have a lot of High-Performance Computing (HPC) Clusters and Artificial intelligent, but it could be used for so much more then that.
Like Hadoop cluster, video content, Private Git Repo and much more.

With a policy driven filesystem can you automatically tier data between multiple media on all directions, but also create copies on different media to secure your data at the same microseconds as it was created, also called Continue Data Protection (CDP).
Because it is build for large scale of number files and filesystem size, you can also backup the data very quick and intelligent, but also restore data much faster then any other Scale-Out filesystem
Spectrum Scale on Ubuntu
IBM recommend Spectrum Scale users to use RedHat Enterprise Linux, but both SuSE Enterprise Linux and Ubuntu Server are supported, but you don’t have all functionality that you have with RedHat. But as long you don’t need Cloud Tiering, Ubuntu is a great opensource option and a great operating system to play around with IBM Spectrum Scale.
Test Environment
In the test environment I’m using a 3 node Cluster based on Ubuntu Server 20.04 LTS, if you looking at to use Ubuntu 22.04 LTS, you will end up with a few problems where the Python library ‘MutableMapping’ is not supported from Python version 3.8 or above. You can probably downgrade Python in Ubuntu 22.04 to version 3.7 but I haven’t test that yet.
My test environment is three Virtual Machines located on a SafeSpring Cloud, and I created the cluster on the smallest machines they have using three public IPv4 address to communicate between each other.
This is not the most secure way but easiest to just get this ongoing for this blog.
Prerequisites
System Upgrades
Before we even install anything, let’s do our homework and install all dependencies and prerequisite to get Spectrum Scale working on all our nodes.
You need to do the same steps on all nodes, if you want to script this or use Terraform to automate this steps, feel free to do that.
sudo apt-get update -y
sudo apt-get upgrade -y
Disable Auto Upgrades
We need to make sure our Ubuntu Server is not automatically upgrading any packages, because Spectrum Scale is kernel independent, and if you automatically upgrade the kernel you may end up with a cluster that stop working unexpected.
Modify the file /etc/apt/apt.conf.d/20auto-upgrades
FROM:
APT::Periodic::Update-Package-Lists "1";
APT::Periodic::Unattended-Upgrade "1";
TO:
APT::Periodic::Update-Package-Lists "0";
APT::Periodic::Download-Upgradeable-Packages "0";
APT::Periodic::AutocleanInterval "0";
APT::Periodic::Unattended-Upgrade "0";
And the file /etc/apt/apt.config.d/10periodic
FROM:
APT::Periodic::Update-Package-Lists "1";
APT::Periodic::Download-Upgradeable-Packages "0";
APT::Periodic::AutocleanInterval "0";
TO:
APT::Periodic::Update-Package-Lists "0";
APT::Periodic::Download-Upgradeable-Packages "0";
APT::Periodic::AutocleanInterval "0";
Reboot your system to make sure everything boots up normal.
Dependency installation
When the server starts up you can start installing the dependencies we need to get the installation working.
sudo apt-get install python3 python3-pip net-tools ansible=2.9* cpp gcc g++ binutils make -y
Network and firewall settings
Make sure the the firewall approve TCP connections over port 22 and 61000-62000 for internal communication between each other.
We do also need to generate SSH Keys for root on each host so we can do passwordless communication between the hosts, and the easiest way to do that is to run ssh-keygen as root.
ssh-keygen -q -t rsa -N '' -f ~/.ssh/id_rsa <<<y >/dev/null 2>&1
You do also need to copy all ssh keys to each host, but as default Ubuntu has disable root login and also password login over SSH.
Their for do you need to modify the sshd configuration temporary.
sed -i 's/PermitRootLogin yes/#PermitRootLogin prohibit-password/g' /etc/ssh/sshd_config
sed -i 's/PasswordAuthentication yes/PasswordAuthentication no/g' /etc/ssh/sshd_config
systemctl restart sshd
Set the password for root on each host so you can run ssh-copy-id in the next step and make sure we can communicate between each other over ssh.
You do also need to copy the ssh key to local host so Spectrum Scale can communicate locally.
passwd
ssh-copy-id scale1
ssh-copy-id scale2
ssh-copy-id scale3
When you have copy the ssh key between all the cluster hosts you can then run a test script we did a IssTech for testing passwordless ssh login. You can find the script at our github.
Last thing before we start the installation, this is only optional but when you administrate your cluster on daily basis, this is really nice lifehack, but put the Spectrum Scale binary directory part of you profile path.
echo "PATH=$PATH:$HOME/bin:/usr/lpp/mmfs/bin" >> ~/.bashrc
Installation & Configuration
Extract Spectrum Scale
You do only need to upload the Spectrum Scale package to one of the nodes and extract that.
chmod +x Spectrum_Scale_Advanced-5.1.3.0-x86_64-Linux-install
./Spectrum_Scale_Advanced-5.1.3.0-x86_64-Linux-install –text-only
Configure Ansible
First do we need to set our deployment server IP.
./spectrumscale setup -s <NODE IP>
Cluster Configuration
We need to set all our configuration for our cluster, mainly what we do is specify the path to ssh, scp client, specify the communication ports and specify our cluster name.
| Switch | Comments | Example |
|---|---|---|
| -c | Cluster Name | -c scale.isstech.local |
| -r | Path to SSH Client | -r /usr/bin/ssh |
| -rc | Path to SCP Client | -r /usr/bin/scp |
| -e | Port Rang | -e 61000-62000 |
The Ansible binary and configuration directory is located under /usr/lpp/mmfs/<version>/ansible-toolkit and this will be our working directory rest of installation and configuration section.
Now do we need to set our cluster name, port range and pointing out our path to ssh and scp.
 cd /usr/lpp/mmfs/5.1.3.0/ansible-toolkit
./spectrumscale config gpfs -c scale.isstech.local -r /usr/bin/ssh -rc /usr/bin/scp -e 61000-62000
If you want to view your configuration you can run ./spectrumscale config gpfs --list
I’ll will not use callhome functionality but if you will do that you need to run following command.
./spectrumscale callhome config -n CustName -i CustID -e CustEmail -cn CustCountry
In my case will I run callhome disable
./spectrumscale callhome disable
You do now have the minimum configuration to start the installation, but let’s continue and assign roles to our nodes and assign our disks for our filesystem.
Configure Node Roles
Let’s make all three nodes to Quorum, Manager, Admin and NSD nodes.
If you don’t have three Quorum nodes, you need to create a TieBreaker Disk so Spectrum Scale knows who is owner of the cluster.
./spectrumscale node add --quorum --manager --admin --nsd scale-1
./spectrumscale node add --quorum --manager --admin --nsd scale-2
./spectrumscale node add --quorum --manager --admin --nsd scale-3
Add Disk to our Cluster
Let’s add disk to our configuration file so when the server comes up it will automatically assign disk to it and create the filesystem for us.
In my case I only have local attach disk, but normally you should have a shared disk. If you are using local disk only, you should run your cluster in FPO mode.
If you use a shared disk you should add the switch --secondary <hostname>
./spectrumscale nsd add --primary scale-1 --filesystem scale --usage dataAndMetadata /dev/sdb
./spectrumscale nsd add --primary scale-2 --filesystem scale --usage dataAndMetadata /dev/sdb
./spectrumscale nsd add --primary scale-3 --filesystem scale --usage dataAndMetadata /dev/sdb
Install via Ansible
Let’s rock-n-roll and test our ansible script by adding the --pr switch to our installation.
If that works fine, just remove the --pr and run the command again and grab some coffee or any other favorite “Swedish Fika” drinks.
./spectrumscale install -pr
./spectrumscale install

If you got an error saying something like this
[ FATAL ] With 5.0.0.0 and onward, callhome is enabled by default in the install toolkit
and is strongly encouraged to be configured. If callhome is not desired at this time, please disable callhome (./spectrumscale callhome disable) and retry this precheck. If desired, callhome can be enabled (./spectrumscale callhome enable), configured (./spectrumscale callhome config) and installed (./spectrumscale install) at a later time with the install toolkit, the management GUI or mmcallhome directly. There are currently no configured callhome settings. Configure callhome with minimum config parameters (./spectrumscale callhome config -n < customer name > -i < customer id > -e < customer email > -cn < customer country >) and retry this precheck.
Then run the command “./spectrumscale callhome disable” one more time and then rerun the installation.
Congratulation the installation is now done
We can now verify it works and few commands you can run is following. All commands are located under /usr/lpp/mmfs/bin but if you profile has been reloaded then should you have that in your path.
mmlsfs all
mount | grep <filesystem>
fallocate -l 1G <path to filesystem>
We all love sharing our knowledge, and we hope this was to a big help for you.